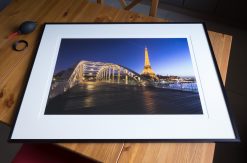
When doing landscape photography, the tripod is certainly the most important piece of kit a photographer can own! It allows dealing with slow shutter speeds, low light situations and reducing camera shake for capturing sharp photographs. Because using a tripod seems at first relatively straightforward: just extend the legs and clip the camera; photographers often rush the shoot and lack the necessary patience to properly set up their tripod, missing an opportunity for a successful image. It is so easy to get carried away with the beauty of the scene in front of us, only to get home and discover that our images are not quite sharp. This is one of the biggest frustration a photographer can felt and one that I have felt many times.
In the field, it is extremely important to be methodical setting up your tripod and to take the time to review what you have captured. In this article, I want to explore the things to keep in mind when using a tripod to get the greatest possible stability and take the sharpest images.
1) Get the right tripod
Often, new photographers are a little strapped for cash after buying their first camera and end up with a cheap tripod, only to realize later that it can’t hold their camera steady in a little breeze. The old adage of “buy cheap, buy twice” has never been truer when it comes to tripods and the best advice I can offer is to buy a sturdy tripod the first time. It’s always better to save a little longer than buying a cheap peace of equipment that you will need to replace; you will save your money in the long run.
2) Always take your tripod with you
Most of successful images are taken with a tripod. If you would like to take tack sharp images and get the most of the resolving power of your lens and high-pixel count camera, you definitely need to shoot from a tripod. So, never let your tripod at home when you go shooting.
3) Set your tripod aside to compose
First and foremost, you need to find the best composition possible. Walking around the scene with the tripod often end up with a poor choice of framing. Freeing yourself from the tripod while composing will allow you to explore the scene more easily and may prevent you to take the same scene with the same angle as everyone. After you have found a potential composition, it’s always worthwhile to take a picture and to review it carefully on the LCD. If you’re not totally happy with your framing, try to move a little this way, a little that way, try raising or lowering the camera, until you’ve found your composition, and only now, deploy your tripod.
4) Put your tripod on a solid ground
When setting up your tripod, make sure it is planted on a solid secure ground; spongy or boggy surfaces such as grass are not suitable as they lead to vibrations. Try to find something hard to put your tripod, or if it is not possible, dig it firmly into the ground.
5) Always extent the thickest leg sections first
The proper way to extend a tripod is top down. When the full height of the tripod isn’t required it’s better to extend the thickest, upper, legs first, as they are the strongest. For stability, spread the legs as far as possible, until they hit against the stops.
6) Only extend the centre column as a last resort
Do not extend the centre column, unless you have to; this is the least stable part of the tripod. Achieve the height by extending the legs first.
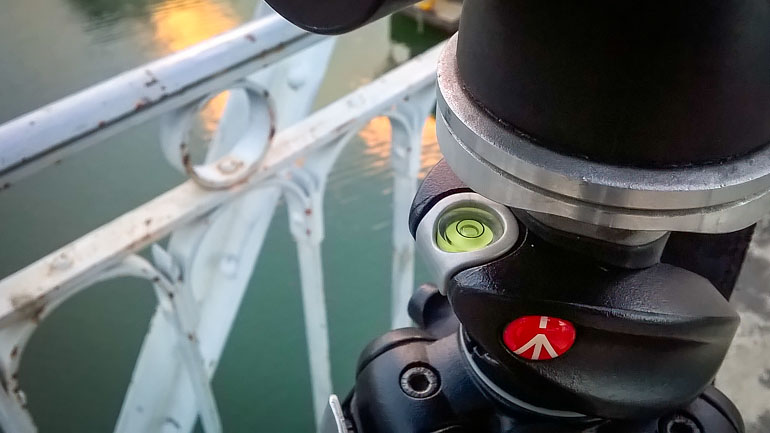
7) Keep the centre column perpendicular to the ground
A leaning tripod is a unstable tripod, and if you don’t want to damage your precious camera and lens, try to keep the centre column perpendicular to the ground as much as possible. Not only it ensure that the weight of your camera is evenly distributed to all three legs, but also that the camera will remain level if you need to pan the head of the tripod, to take a panorama for example. If your tripod has a bubble level attached to the centre column, it’s the way to go.

8) Weight your tripod
For extra stability, hang your camera bag to the weight hook of your tripod to lower its centre of gravity. However, in case of strong wind, this technique may cause more problems than it solve as your camera bag may shake and bump on the tripod legs. An better alternative is to use bungee cord; that way, your camera bag will stay still on the ground, unaffected by wind and the bungee will act like a damper, improving the whole setup stability. If your tripod doesn’t have a weight hook, you can still use this technique since the bungee has its own hooks.
9) If your lens has a collar, use it
Your camera-lens setup will be more evenly balanced and more stable if attached to the tripod with the lens collar, especially when shooting vertically. Always avoid a front-heavy setup.
10) Use an L Bracket
When shooting in portrait orientation, your setup will be heavier on one side, which might not be stable or secure. L Brackets can be expensive, as they are made specifically for each camera, but I think it’s worth the investment if you can afford it.
11) Make sure everything is tight
Before shooting, check and double check if every fixings are locked off tight, including the centre column lock and the quick release plate attached to the camera.
12) Switch off image stabilization
Image stabilization (IS) is an electromagnetically controlled system built either in lens or into the camera to detect handheld camera shake and compensates by moving a free floating image sensor (in camera IS) or a floating lens element (lens-based IS). When your camera is mounted on a tripod, the IS system will try to compensate for movement that doesn’t exist and may enter in what’s called an electronic « feedback loop », creating unwanted blur to the photograph, therefore it should be turned off. Some camera manufacturers such as Pentax automatically switch off the IS system when bulb mode, remote control shutter release, self-timer, or wireless strobe is used, but when in doubt turn it off yourself. Personally, I customized a user mode dedicated to landscapes on my Pentax K-5 with my default settings: ISO 80, IS disabled, mirror lockup, etc.
13) Turn off autofocus
When working with a tripod, I recommend to get your focus right, and then switch out of the autofocus mode, that way, you will not accidentally change your focus. If you prefer to manually focus, « Live View » is a quite handy tool as you can zoom in to your subject and set the focus point more precisely.
14) Use a cable release or self-timer
Cable release is a nice peace of kit to pair with a tripod as it prevent you from touching the shutter release and risking vibrations. If you don’t got one, most camera have a 2-second timer that will wait 2 seconds after you push the shutter release in order to minimize camera shake. If your DSLR has a « mirror lockup » mode, use it. When you release the shutter, your camera’s mirror will pop up, then the camera will count 2 seconds before it take the photo.
15) Last but not least, give your tripod a regular maintenance
It is just an awful situation when in the field you can’t rely on a properly working tripod. Simple things such as cleaning your tripod after it was submerged in salt water or periodically tightening loose fixings will help to avoid troubles and will add years of use.
I hope you liked this article. Please let me know if you have any questions in the comments section below.